Guide
Before opening your new “Clean” solution and “Glitter” liquid bottles, please read the following guide.
Prepare your glass globe by cleaning it thoroughly using the detergent of your choice. Be sure to rinse your globe several times to eliminate all detergent.
Pour the Stardust Lamps “Clean” solution into your already well-cleaned and rinsed glass globe.
Swish the “Clean” solution around so that it coats the complete inside surface of your glass globe.
Pour out the “Clean” solution from your glass globe, allowing as much of it as possible to drain into your sink.
Your glass globe is now ready for filling with Stardust Lamps “Glitter” liquid. No need to dry any residual “Clean” solution.
Before opening the "Glitter" liquid plastic bottle, turn it upside down a couple of times to give the glitter a final mixing.
Using a funnel, pour the “Glitter” liquid slowly into your glass globe to minimize the air bubbles.
Don't Overfill. The glitter liquid expands as it heats. The liquid should be about 1/4" to 1/2" below the decorative cap.
Don’t worry if a small amount of glitter remains in the plastic “Glitter” bottle. Extra glitter has already been included to compensate for this.
Reseal your glass globe. This may mean reinstalling the original screw cap or crimping a new bottle cap.
The glitter usually begins flowing in an hour or less. It may take a couple of runs for the air bubbles and any associated cloudiness to dissipate.
For best long term results:
use the same wattage bulbs (or lower wattage bulbs) recommended for your lamp's base.
run your glitter lamp for 12 hours or less, allowing time for your lamp to completely cool down before running it again. Excessive prolonged heat can damage the glitter.
Enjoy!
How to Fill Your Globe
Slow Glitter Liquid Requires No Bulb Changes
The Slow Glitter liquid now flows on the same wattage bulbs as the Fast Glitter liquid. Slow Glitter liquid can flow on lower wattage bulbs, too. The ink dyes are now equally fade resistant in both the Slow and Fast Glitter liquid.
Glitter Liquid Ink Dyes
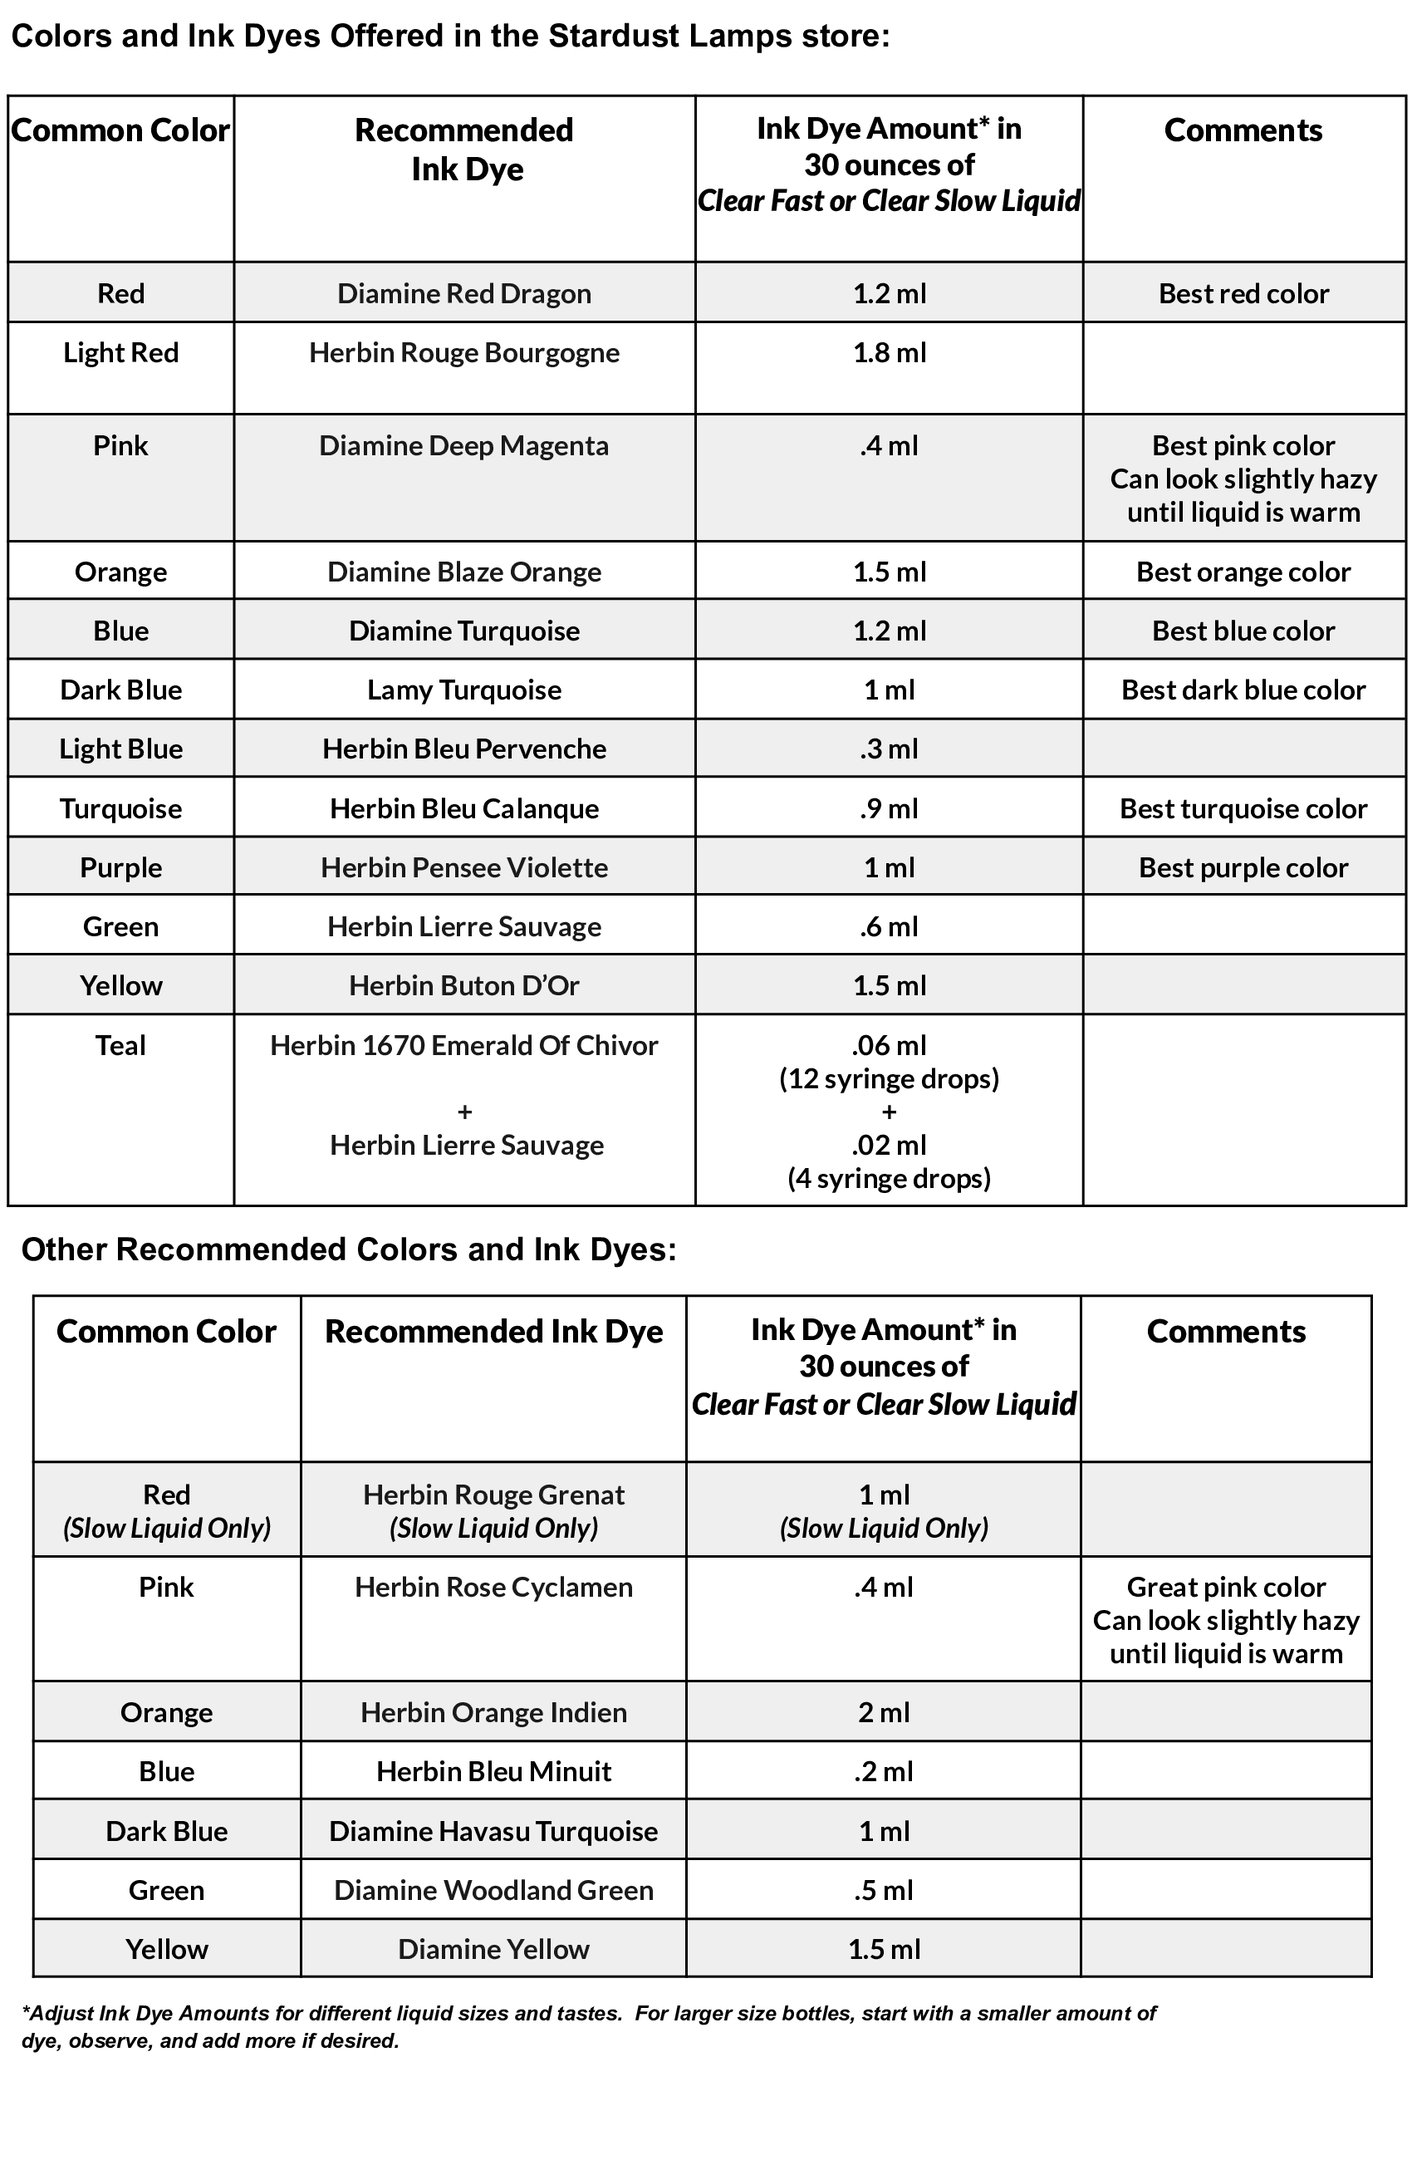
The following table lists recommended ink dyes for dyeing your fast and slow glitter liquid.
All of these ink dyes have been tested for color, clarity, and longevity in Stardust Lamps Glitter Liquid. They have not been tested in Lava Lamp Master Fluid.


The recommended dyes can be purchased at any of the following websites:
Troubleshooting
This usually only happens the first time you run your glass globe. After the first run, your glitter should flow normally.
Allow at least an hour for the glitter to start flowing after turning on.
If glitter is still stuck at the top, you can loosen it by turning the glass globe upside down a couple of times.
The liquid in your globe may be getting too hot.
Use the recommended bulb wattage:
Fast Glitter: ensure the bulb is the correct wattage for your base.
Slow Glitter: see above guide for recommended bulb wattage.
Keep your globe at typical room temperature. Cooler is safer than warmer. Direct contact with warm or cold air coming from your home’s air vents can affect the flow of the glitter.
Keep your globe out of direct sunlight, which may raise the temperature of the liquid.
Why is some or all of the glitter stuck at the top of my globe?
Why is my glitter not flowing all the way to the top of my globe?

